How to add your business to Google Places, Bing Local & YELP
- Best Practices
Google Places
We’ll give you all the details you need about adding your listing, but keep in mind that there are three general steps before your listing will appear on Google:
- Submit your information, from basic contact info to photos and video.
- Verify your listing by phone or postcard.
- Wait for your listing to appear on Google. In most cases, it shouldn’t take more than 12 hours.
Here are detailed step-by-step instructions for how to add your business information to Google Places:
- Visit Google Places – https://www.google.com/places/Please read our Google Places quality guidelines and Local listings content policy prior to creating your single listing.
- If you already have a Google Account, sign in with your email and password. You can also use an AdWords login address and password, if you have one. If you don’t have a Google Account, click Sign up for an account now, or go straight to the sign-up page. Google Places accounts are not transferable, so if you are planning to share this account with other users, create a Google account that you would not mind sharing with others.
- On Google Places homepage, click Add new business.
- On the “Find your business” tab, search for your business by phone number to see if Google already has information about your business.
- Select the country of your business location from the drop-down.
- Enter the phone number of your business listing.
- Click Find business information.
- Review the search results, if any, to see if one of them describes your business.
- If none of the results are related to your business, you will be prompted to add business information on the Edit Details page.
- If none of the results is your business, click Add a new listing. You’ll be prompted to add more information on the next page.
- Fill out the basic information about your business. This includes:
- Company/Organization: This is the official/registered name of your business.
- Address (required): The address should look exactly the way you’d write it on a standard mailing envelope. If you are a service-area business, you’ll be able to hide your address in a few steps.
- Phone Number (required): Be sure to include the area code with your phone number.
- Website: Your website URL can be a maximum of 255 characters.
- Click Next. You’ll now have the opportunity to provide the following information about your business:
- Categories: Enter several categories to describe your business, to make it easier for others to find when they search Google. Google will automatically suggest categories as you type. Make sure you choose one Google-suggested category before adding customizable categories. You can enter up to 5 categories for your business.
- Hours of operation: Select your hours of operation using the dropdown menus. If would prefer not to specify your hours of operation, keep the radio button selected next to “I prefer not to specify operating hours.”
- Payment options: Select the checkboxes next to the payment methods that your business accepts.
- Photos: Use the photo uploader to add a photo from your computer, or specify a URL to add a photo from the web. You can add up to 10 photos to your listing. Photos will appear in order of greatest size and quality. To learn more about adding photos, check out the User Guide.
- Video: To add a video, upload it to YouTube and copy and paste the URL to your Places listing. You can add up to 5 videos to your listing. For help with uploading your video to YouTube, read the article on how to upload a video in the YouTube Help Center.
- Additional details: Use this section to add custom information fields to your listing. For example, parking availability, or whether your business allows pets. Learn more about useful custom attributes to add to your listing.
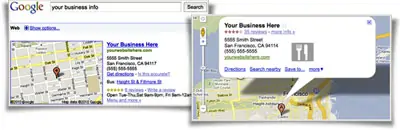
- You can preview your listing as it will appear in Maps on the right side of your screen. New information will appear in the preview as you enter it. When you’re satisfied with your listing, click Submit at the bottom of the page.
- Choose how you would like to verify your listing and click Finish.
Bing Listing Center
Add a listing

You can create a business listing with a wealth of rich information, including photos. After you add your business information to Bing Local Listing Center, users of Bing Maps can view the information when your business is listed in their search results. To help protect you from unauthorized use of your business listing, your listing won’t be published until you’ve confirmed it. Follow step-by-step instructions provided bellow:
- Go to https://www.bing.com/local/
- Add your business information.
- Select categories that describe what your business offers.
- Review your business information.
- Review the terms of the service agreement and privacy policy, and then click I Accept.
- Complete the confirmation process.
If you have any problems or questions on how to add Bing listings you can visit this section to get more detailed information.
Yelp Business Listings
How to Add a Business to Yelp

Adding a business to Yelp is an extremely easy process that will not only increase your businesses online presence but it will also increase your businesses exposure to a local targeted audience when utilized correctly. Here we provide step-by-step instructions on how to add a business to Yelp.
- Sign up for a free business owner’s Yelp account https://business.yelp.com/
- Fill in your business name and location to search for listings that exist already.
- Unlock your business if it already exists in the database and has not been claimed.
- Add your business here if it is not currently listed.
- Wait for your added business to be approved and while you wait fill in your business profile on Yelp.com so that once it is added to the search database.
If you have any problems or questions on how to add business to Yelp it always makes sense to visit this section to get more detailed information.